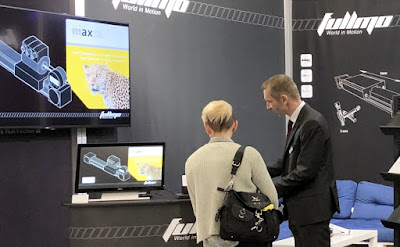
Docklight to the rescue when the pressure is on
Recently we
created a demo for the fullmo MovingCap position drives and a max GmbH linear axis.
Such a toothed belt axis can feature excellent repeat accuracy, if designed and
manufactured with great care. To showcase this, we had a Helios Preisser digital indicator with RS232 data
interface at hand. Plus a small leaflet for documentation and close to zero
time for the integration.
 |
| Helios Preisser distance measurement using fullmo Kickdrive and Docklight DLL |
The measurement
gauge integration into our demo took me about an hour: Around 20 minutes of
manual testing using Docklight and a
standard RS232/USB adapter, and another 40 minutes for coding the integration
into the actual demo UI. Docklight takes care of all the tricky parts here. The
resulting demo was a Kickdrive UI Panel
application. Kickdrive allows creating high quality HMI with smooth animations
via the underlying Qt Quick / QML technology, but it also integrates the Docklight DLL API in
a way that allows simple text messaging to do the interaction.
A Docklight project for the Helios Preisser protocol
The Helios
Preisser products use a custom ASCII protocol with additional handshake logic:
- RTS needs to be constantly high to supply Vcc for the data interface.
- DTR is High by default, but needs to be reset to low for > 100ms to request a new measurement reading.
- Communication parameters are slightly exotic : 4800 Baud, Even Parity, 7 Start Bits, 2 Stop Bits.
!!! 001 &&& 010 !!! 003
- The first !!! Function Character with parameter 001 will set RTS=high, DTR=low.
- &&& 010 inserts a delay of >= 100 ms.
- !!! 003 will set RTS=high, DTR= high.
Note: When opening the COM port, Docklight sets RTS=high, DTR=high by default.
Some quick
manual testing:
05.10.2018
17:15:40.750 [TX] -
05.10.2018 17:15:40.952 [RX] - +001.84<CR>
05.10.2018 17:15:41.750 [TX] –
05.10.2018 17:15:41.951 [RX] - +002.60<CR>
05.10.2018 17:15:42.751 [TX] -
05.10.2018 17:15:42.952 [RX] - +002.60<CR>
05.10.2018 17:15:43.752 [TX] -
05.10.2018 17:15:43.954 [RX] - +002.60<CR>
05.10.2018 17:15:44.753 [TX] -
05.10.2018 17:15:44.955 [RX] - +000.00<CR>
Our gauge
works – Great!
Now add a Receive
Sequence to safely trigger on each reading. We use ? wildcards for the variable measurement result, but anticipate the position of the decimal point. In ASCII representation, here is how this looks:
<?><?><?><?>.<?><?><CR>
<?><?><?><?>.<?><?><CR>
With
Receive Sequence Comment definition: Result: %_A(1, -2)
(Comment
macros like %_A always come in handy.)
So our
Docklight communication screen after receiving a new measurement looks like this:
17.10.2018 21:38:00.258 [RX] - +002.60<CR>
Result: +002.60
Finally
store everything as a Docklight project file helios_data.ptp .
The actual demo in Kickdrive / QML / Qt Quick
Now some
quick integration into our QML / Qt Quick UI.
Note that what
you see below is already a “bells & whistles” integration that deals with hot-plug
/ re-plug situations a.s.o. You know, trade show situations...
The added
code in the QML / Qt Quick UI - everything is text messaging, so for the
Docklight interaction we add:
// Helios RS232 readout via Docklight
property
string sendDocklightCmd: "Docklight:KM_DOCKLIGHT:KS_REQUEST:"
property
string docklightReceiveToken: "KM_COMM_DATA:KS_INFO:Receive:Result:
"
property
string docklightFail: "KM_DOCKLIGHT:KS_FAIL:"
property bool docklightCommError: false
Two small convenience functions…
function sendDocklightCommand(command)
{
messageStrOut(sendDocklightCmd
+ command);
}
function sendSequence(sequenceName)
{
state = "CONNECTED"
sendDocklightCommand("SendSequence(\"" + sequenceName + "\")");
}
You have to love timers in Qt Quick….
Timer {
id:
demoSensorReadout
interval:
docklightCommError ? 3000 : 200
repeat: true
running:
onTriggered: {
sendSequence("Get")
}
}
Timer {
id:
demoSensorTimeout
interval: 4000
repeat: false
onTriggered: {
sendDocklightCommand("StopCommunication()");
}
}
Here is the main function that processes all incoming messages, be it
CANopen or the Docklight API command results. ….
function processMessageStrIn(msgStrIn)
{
Note that loading our tried and tested Docklight project
“helios_data.ptp” avoids any possible headache.
// First message - this arrives once the project is
loaded
if (msgStrIn.indexOf("KM_APPLICATION_CONTROL:KS_INFO:projectloaded") !== -1) {
…
// Docklight project load
sendDocklightCommand("OpenProject(\"helios_data.ptp\")");
// tell Kickdrive to forward any Docklight
communication output sendKickMessageOut("Docklight:KM_SETPROPERTY:KS_REQUEST:CommProcessingMode=AR");
demoSensorReadout.restart()
demoSensorReadout.restart()
…
else if (msgStrIn.indexOf(docklightReceiveToken) !== -1) {
// watch out for the Result: tag we defined in our
Receive Comment
docklightCommError
= false
var strAnswer = msgStrIn.substring(msgStrIn.indexOf(docklightReceiveToken) +
docklightReceiveToken.length);
// skip one leading zero
demoMeasurementValue
= strAnswer.substring(0, 1) + strAnswer.substring(2);
demoSensorTimeout.restart()
}
else if (msgStrIn.indexOf(docklightFail) !== -1) {
docklightCommError
= true
}
The
graphical widget for the gauge simply applies the demoMeasurementValue
property value:
GaugeDisplay {
id:
measure2
value: main.demoMeasurementValue
x: 846
y: 518
scale: 0.35
isometric: true
}
Again - you
just have to love Qt Quick for how easy this can be bolted together.
The
resulting demo ran smoothly throughout the trade show days at MOTEK 2018 and SPS 2018. It’s why we made and
use Docklight – we need something that “just works”.
 |
| "Just works" software built with Docklight and Kickdrive - no glitches, no hiccups, no freezes, no restarts. |
So if you have
a similar task / project and need some pointers – let us know. For Company License and Docklight DLL
license customers we also provide in-depth application specific support,
including example projects and scripts to get things started.
Marco
Flachmann and Oliver Heggelbacher
- The
Docklight Developers –

Comments
Post a Comment